How to embed a file into a Word document
Instructions are for Microsoft Word 2010, future versions are similar. For Office for
Mac see section 2
1 Microsoft Word
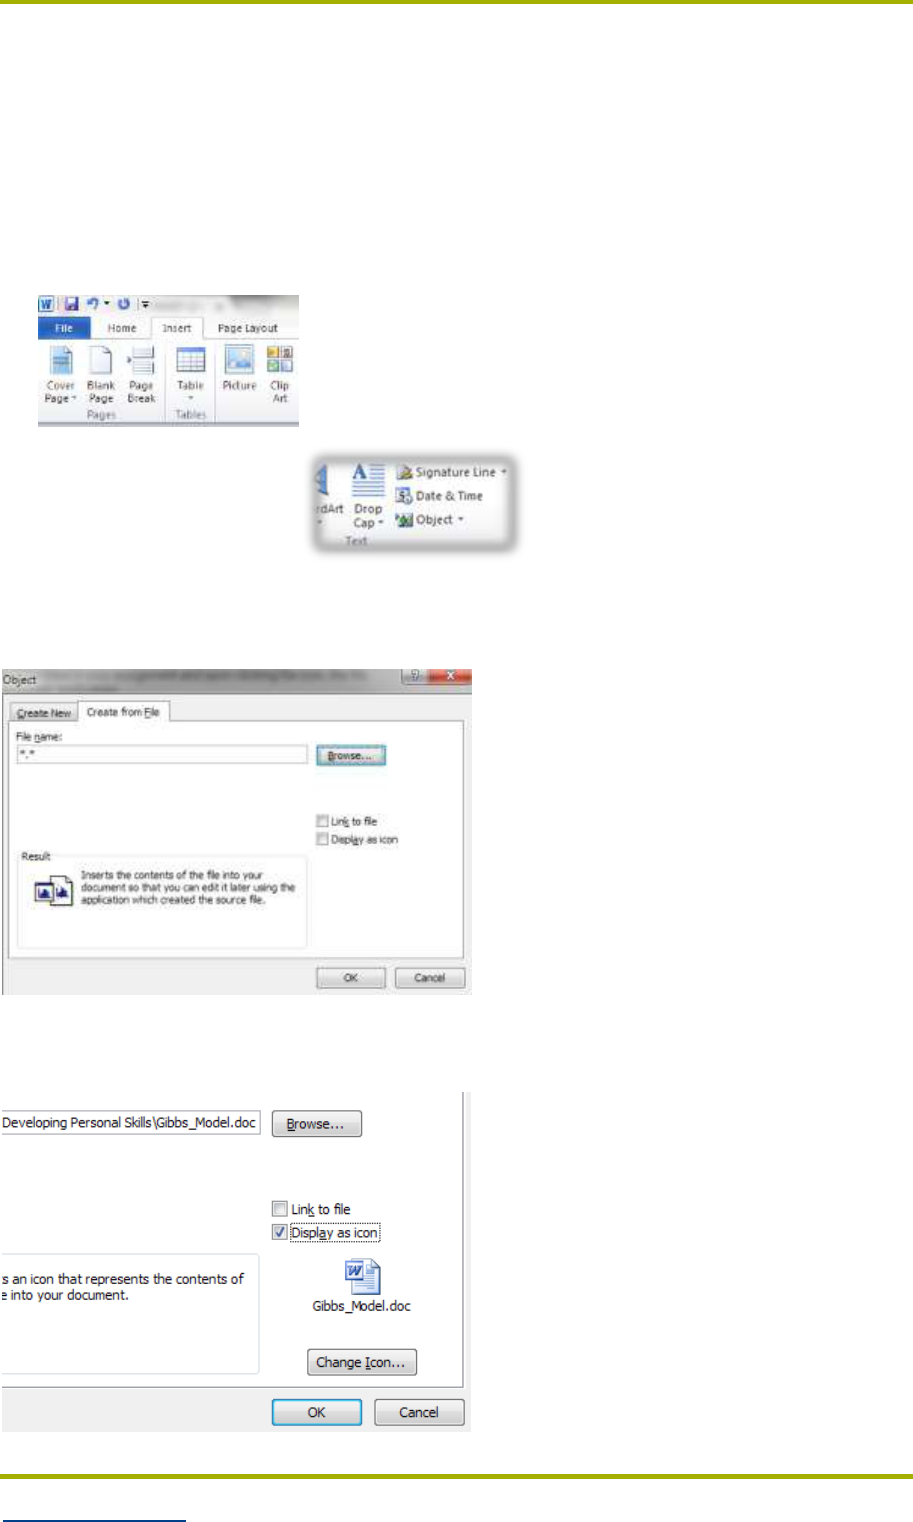
1. Click the Insert menu to display inserting options. This will be located in the
‘ribbon’ at the top of your screen, underneath the title bar.
2. Click on Object from the Text section.
3. This will open a dialog box. You are presented with two tabs: Create New and
Create from File. Create from File allows you to browse to a file that already
exists i.e. your intended attachment.
4. Choose the ‘Create from File’ tab and click Browse to locate your file from your
own computer – select the file and press OK
5. Tick the box Display as Icon:
only an icon will appear in your
document.
6. Click OK.
Your file is now embedded in your
assignment and upon clicking the icon,
the file opens in its appropriate
application.

2 Office for Mac - Word
Note that in word for mac you can only insert word documents or Excel files and not
PowerPoint presentations. PDFs will appear as images.
1 Click where you want to insert the link.
2 On the Insert menu, click Object, and then click From File.
3 Locate and click the file that you want to link to. To have readers see only an
icon that they can click to display the information, select the Display as Icon
check box.
4 Select the Display as icon check box, and then click Insert.
